
In this article we will work on integrating Spring Cloud Gateway with Keycloack to implement security and role-based access control within our microserves landscape. The Spring Cloud Gateway will act as a single point of contact for the outside world and routes all requests to underlying microservices. We will configure the Gateway in such a way that it passes the authentication token to the microservices by using token relay.
Setup Keycloack with Docker
We will first configure and run a Keycloack server with a Docker image. To do this, put the following content in a docker-compose.yml file:
version: '3.7'

networks:
  local:
    name: local
    driver: bridge

services:
  keycloak:
    image: quay.io/keycloak/keycloak:19.0.3
    command: start-dev
    ports:
      - '8888:8080'
    environment:
      - KEYCLOAK_ADMIN=admin
      - KEYCLOAK_ADMIN_PASSWORD=admin
    volumes:
      - ./keycloak_data:/opt/jboss/keycloak/standalone/data/
    networks:
      - local
With this configuration Keycloack will listen on localhost:8888. We have also created a volume (optional) so Keycloak persists it’s data on our machine. This will prevent that we have to configure Keycloack each time after we shut down the Docker container. Then we can start Keycloak by running the following command:
docker-compose up
Configure Keycloack
After the Keycloack container is running we can navigate to the admin console, which in our case will run at http://localhost:8888/admin/master/console. The admin username and password which we have configured in the docker-compose.yml file can be used to access the console.
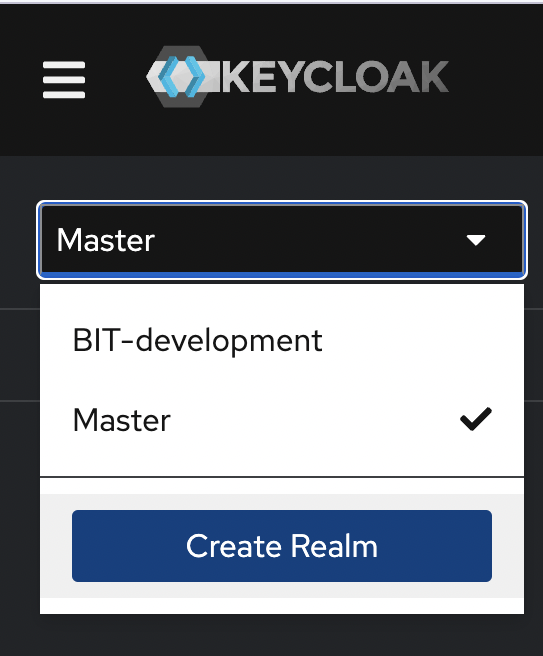
First we will create a new realm for this project. This can be done by clicking on the dropdown and selecting ‘Create Realm’.
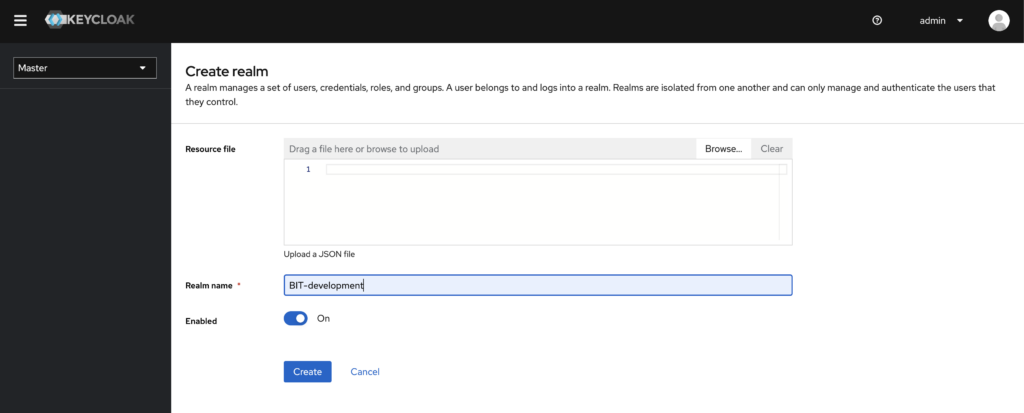
Then we will provide our Realm name and click, make sure the ‘Enabled’ checkbox is checked and click on ‘Create’.
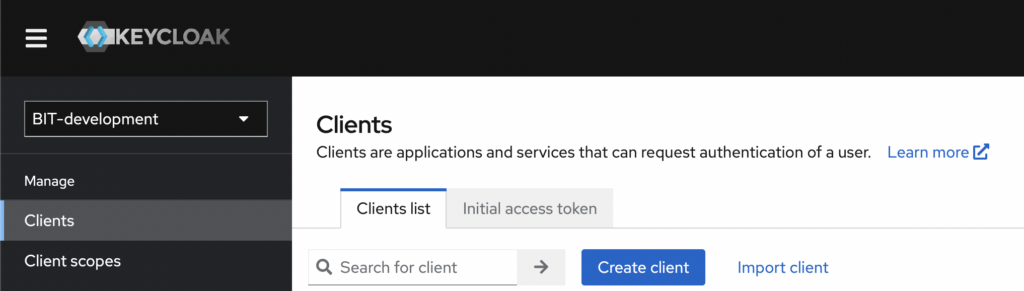
Now that we have created our Realm we are able to create a new Client. The Client will be our Spring Cloud Gateway application which will connect to the Keycloack instance. To create the Client click on ‘Clients’ and then ‘Create client’.
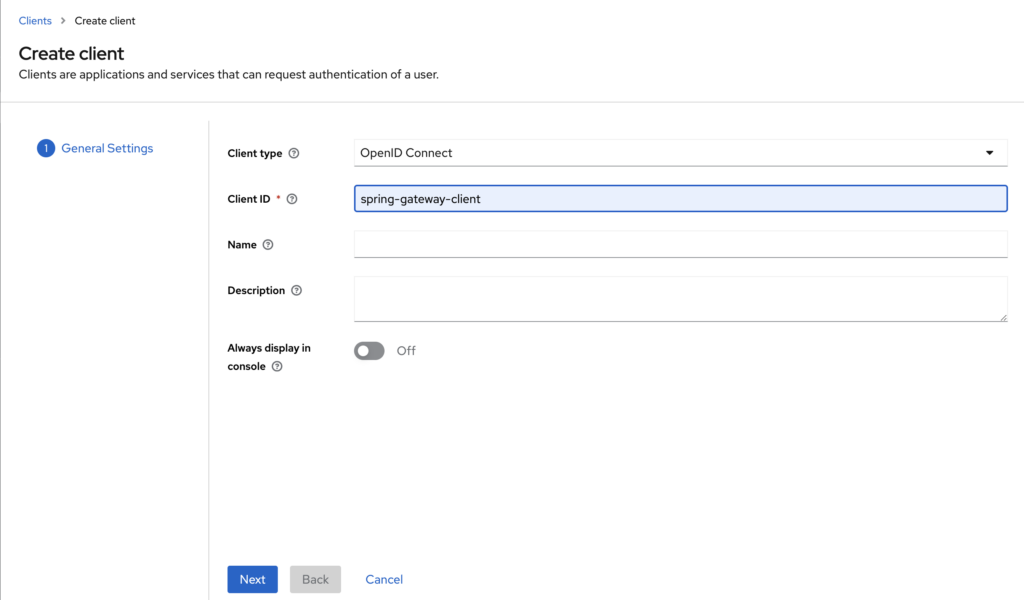
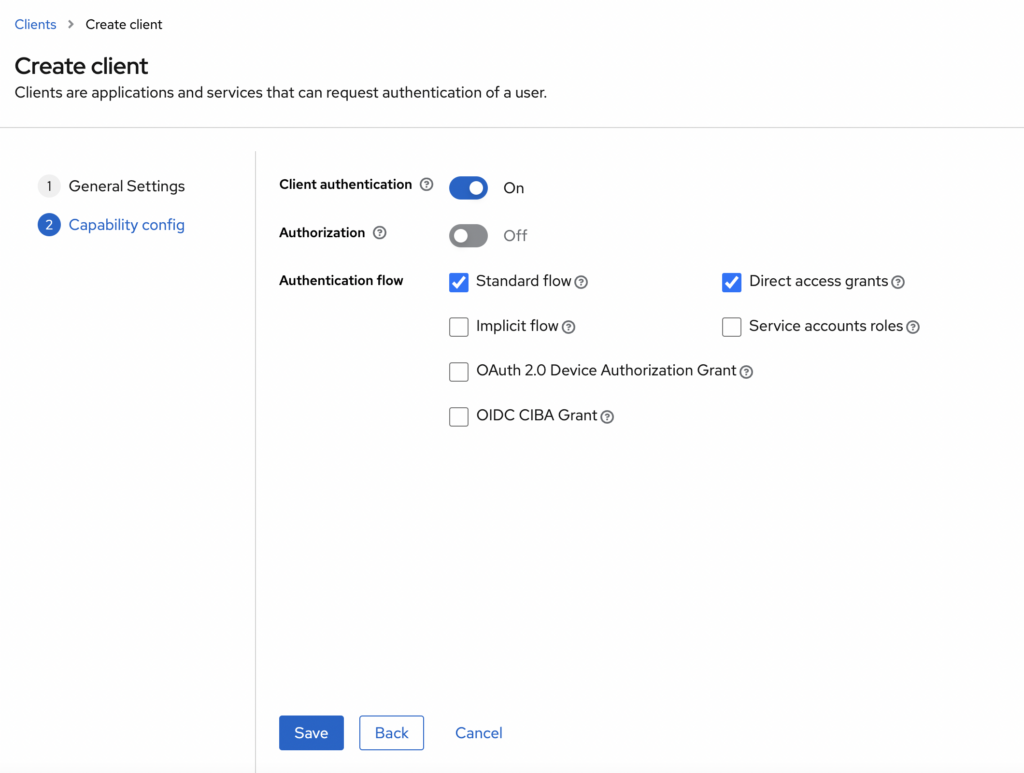
On the next screen you have to provide the Client type, which will be ‘OpenID Connect’ for this tutorial. Also provide the Client ID, this can be whatever you like, but ‘spring-gateway-client’ will be a good descriptive name. The Name and description fields are optional and can be left blank. Then you can click on ‘Next’.
On the next page you should make sure the Client authentication toggle is on. Also the Standard flow and Direct access grants should be checked, but they should already be by default. Then save the new client.
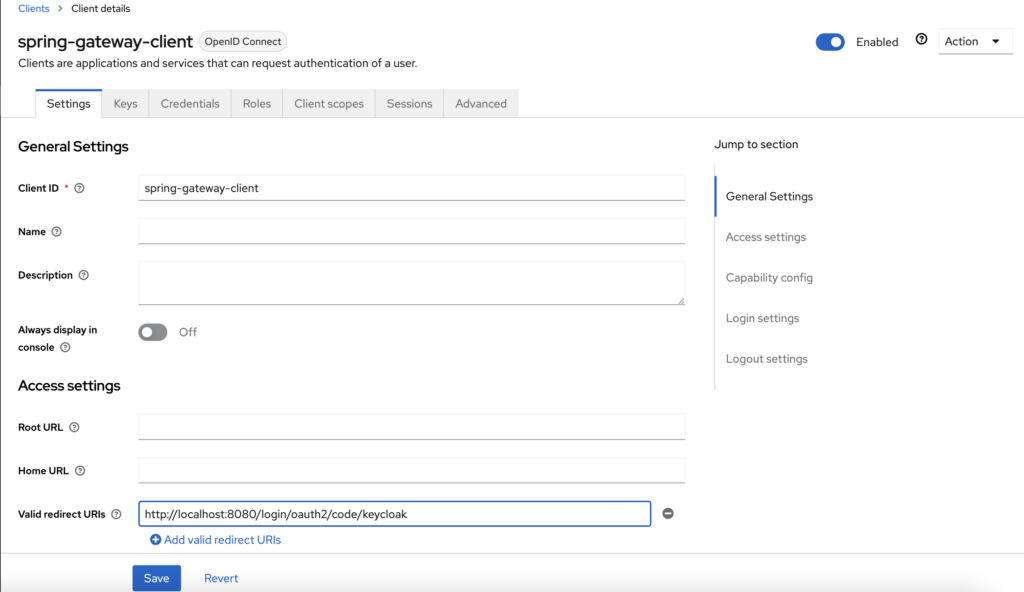
After the client is created we will be send to the client details page. On this page we have to set the Valid redirect URIs. This URI will be called after a successful authentication attempt. Since our Spring Cloud Gateway application (which will run on port 8080 in this tutorial) will be used as a single point of contact, we will add the default Keycloak callback URI http://localhost:8080/login/oauth2/code/keycloak and save it.
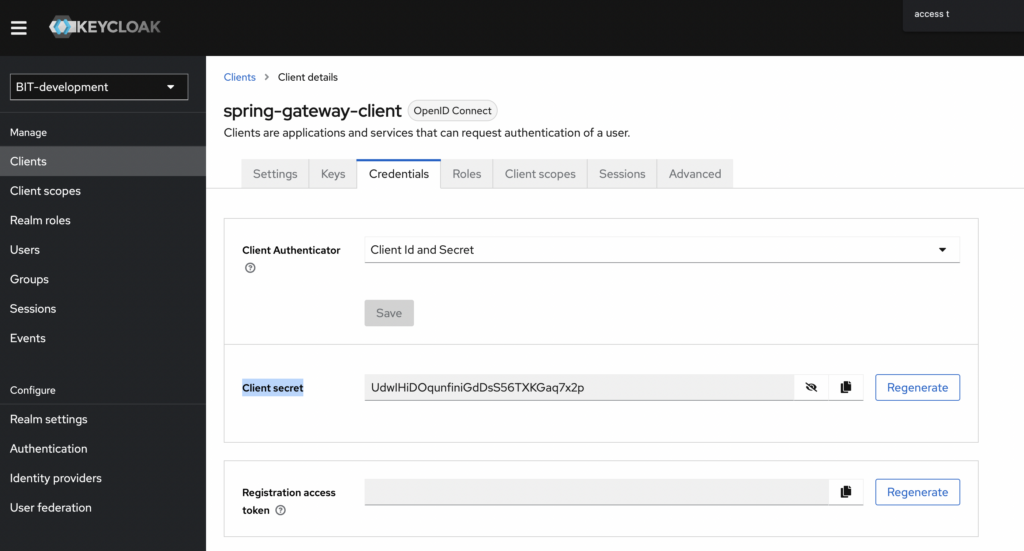
At this point it is good to know that we will also need the client secret which is generated by Keycloak. The secret can be found in the Credentials section on the details page.
For now we have configured Keycloak correctly. We will now first setup the Spring Cloud Gateway application.
Setup Spring Cloud Gateway application
Now we will create a new Spring Boot application, this can be done from your favorite IDE, or go to https://start.spring.io.
- Gateway
- OAuth2 Client
When the project is created we will first edit the application.yml file. There are some properties that have to match with our Keycloak configuration. The issuer-uri have to match with the realm you have created in Keycloak. Also the client-id and redirect-uri properties have to match as configured in Keycloak. The client secret can be found on the Keycloak dashboard as mentioned in the previous step.
server:
  port: 8080

spring:
  application:
    name: api-gateway
  security:
    oauth2:
      client:
        provider:
          my-keycloak-provider:
            issuer-uri: http://localhost:8888/realms/BIT-development
        registration:
          keycloak-spring-gateway-client:
            provider: my-keycloak-provider
            client-id: spring-gateway-client
            client-secret: UdwIHiDOqunfiniGdDsS56TXKGaq7x2p
            authorization-grant-type: authorization_code
            redirect-uri: '{baseUrl}/login/oauth2/code/keycloak'